Make Fabric Masks as Protective as Possible with This Tip

Plus an Overview of Materials and How to Wear and Clean Masks!
While the Centers for Disease Control and Prevention recommends that we all wear masks when leaving the house, some locations now require them. Consequently, if you aren’t already making masks, chances are that you will be soon – or are looking for ready made masks to purchase (more on that later).
The idea is for everyone to wear masks so we don’t spread disease to each other. But, let’s be honest. We also want to protect ourselves from contracting the virus.
New research provides a tip for making home made fabric masks as protective as possible. It’s simple, inexpensive and will work with many styles of masks.
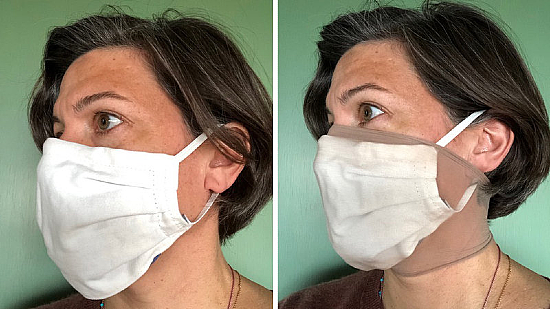
Simply cut an 8″ to 10″ tube from pantyhose (or tights) and slide it over your head so the mask is fully covered. You may find Queen or Plus sized pantyhose to be most comfortable.
This does two things. It adds another layer to filter tiny microbes. And, it snugs the mask around your face so that you breath entirely through the mask and don’t take in air from unprotected gaps.
Researchers have found that a nylon layer can make homemade masks as much as 50% more effective. That’s an amazing improvement for such a simple “fix” and means that you may not need to be overly concerned about adding a filter to your masks. It has also been determined that just a 1% gap in the mask reduces the filtering ability by half or more – so achieving a tight fit makes a big difference.
Learn more about the benefits of using a pantyhose “sleeve” from this NPR article and this NPR interview.
Are you interested in making masks? What follows is an overview of the most effective materials, where to find patterns, how to clean and use a mask, and more.
Please note that we make no claims whatsoever about the effectiveness of the suggestions included in this article. We’ve simply compiled the latest info from what we believe are reliable sources.
What Are the Best Materials for Masks?
While new research suggests that denim, canvas, bed sheets (cotton 80-120 thread count), paper towels and shop towels are highly effective at filtering tiny particles, tightly woven quilting cotton remains a good choice. Test the fabric by holding it up to the light. If light shines through and you can see individual threads, then it’s not a good choice. Look for fabric that is more tightly woven. Learn more about selecting materials for masks from our earlier article, “What’s the Best Material for a Face Mask?”
Two layers of cotton quilting fabric are a good choice for an effective mask, but many of you who are making masks are interested in adding a third, filtering layer. First, before you do anything, test the combination of materials you’re considering for breathability. Layer up two squares of cotton with your filter choice in between and hold this firmly around your nose. Make sure there are no gaps as you breath through the layers.
Coffee filters are effective but difficult to breath through. Non-woven interfacing can be a good choice (learn more here). Vacuum bags can also be a good choice, provided they do not contain fiberglass (learn more here). If vacuum bags make you uncomfortable consider Polypropylene Filter Fabric (look for nonwoven melt blown fabric that filters at least 95% of particles).
Shop towels and paper towels are also effective filters if inserted into pockets so they can be removed before washing.
Construction of the winning Halyard mask.
Or make your masks from Halyard Sterilization Wrap (learn more here and check out the resources below “show more” under the video). The video by Sewstine demonstrates the testing of four mask designs. The winning pattern is found here.
One layer of a tightly woven cotton sheet combined with two layers of chiffon does an excellent job of filtering out aerosol particles. The chiffon hold a static charge and creates an electrostatic barrier in addition to the filtering of the cotton. Learn more here.
Keep in mind that two bands of elastic (or straps) that go around the head often provide a better fit and are more comfortable than elastic that hooks over the ears.
Also, gaps can be eliminated by taping down the edges of the mask using tape meant for skin.
And, don’t forget the pantyhose tube!
As always, if you’re making masks for health care providers be sure to follow their recommendations for both mask styles and materials.
Sources for Materials Used in Masks
It can be difficult to find elastic and other materials locally. Here are some links to locate items online.
- 1/4″ Elastic
- Elastic Hair Ties – a good substitute for elastic for loops that go around ears
- Bias Tape Maker – works well for straps cut both on the straight grain and on the bias
- Non-Woven Interfacing – find a list of those that are known to work here
- Polypropylene Filter Fabric
- Scott Blue Shop Towels
- Halyard Sterilization Wrap
- Twist Ties for Nose Pieces
- Wire for Nose Pieces
- Tape for Use on Skin
- Queen or Plus Size Pantyhose
Tips for Increasing the Effectiveness When Wearing Masks
Make sure the mask fits snugly against the bridge of your nose instead of hanging off the tip. A metal nose piece will allow you to snug it into place.
Choose a mask that fits snugly all over, including at the cheeks and below the chin.
Do not let the mask touch anything other than your face as you put it on. And be sure to avoid touching the outside of the mask as you remove it (remove it by the elastic or ties). Drop it into a ziplock bag and seal it when you’re done.
Don’t pull the mask down and let it dangle around your neck, then pull it back into place. The inside of the mask can become contaminated by doing so.
Sanitize the mask before wearing it again – or wait a week or more for any trapped virus particles to die.
You’ll find additional tips for safely wearing and taking off a mask here.
How Do You Sanitize Fabric Masks at Home?
Whatever fabrics you choose, be sure to pre-wash them and shrink them fully before sewing.
A good way to sanitize face masks at home is to let them sit for five minutes in boiling water. Keep in mind that your hot water heater may be set at too low of a temperature to sanitize fully during a hot water wash cycle in your washing machine. Learn more about cleaning and storing fabric face masks here.
Where to Find Ready-Made Fabric Masks
Etsy has a great selection of homemade fabric masks. Choose between a number of styles, elastic vs ties and with or without a filter pocket. Be mindful of how they fit the face and choose a size and style that will fit closely without gaps. A metal nose piece will help the mask fit more closely to the face, and choose one made of tightly woven cotton fabric.
- Cotton Face Masks
- Cotton Face Masks with Filter Pockets
- Cotton Masks for Kids (do not put masks on kids below age 2 – learn more here)
Additional Info Sources
- The Ultimate Guide to Homemade Face Masks for Coronavirus – the most recent test results of the effectiveness of various materials
- The best ways to clean fabric face masks
- Using Interfacing in Masks
- Updated COVID info from the CDC
Previous Quilting Digest articles with patterns and other tips:
- What’s the Best Material for a Face Mask?
- Make a Protective Face Mask from Scraps (surgical style masks)
- This Mask Was Designed By a Doctor (good info about using vacuum bags safely)
There are many mask patterns available. If you need one, check our previous articles for patterns, consider the Halyard mask or this basic pattern from Fat Quarter Shop. It has straps, a filter pocket and can be made in four sizes, from child to large adult. However, it does not have a metal piece to snug it across the nose. That wouldn’t be hard to add – once the mask is turned, insert wire through the the unsewn gap, then top stitch the gap closed and stitch just below and at each end of the wire to hold it in place. That page also links to a second mask pattern that attaches with elastic hair ties around the ears.
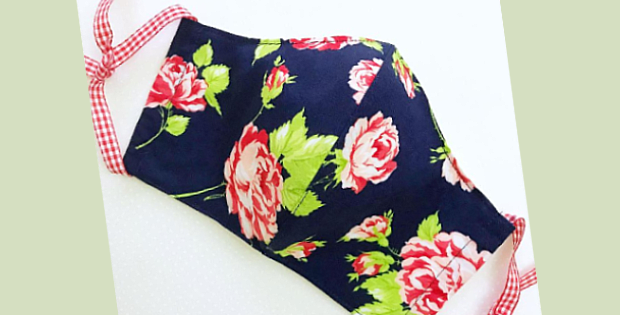
Image Source: The mask at the top of the page is from Maple Cottage Designs.


