A DIY Ironing Station is So Handy for Quilting


Be Sure to Make it a Comfortable Height and Include Wheels!
Quilters are super creative, so it should come as no surprise when they use that creativity to make their sewing spaces more functional and enjoyable.
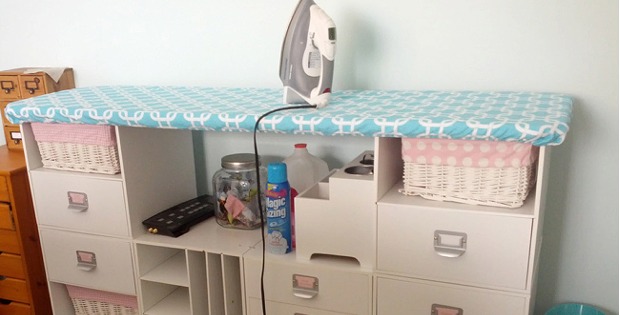
A case in point is the ironing station. A storage unit with an ironing board on top and wheels to move it around is popular among quilters. It’s easy to see why!

Ironing Station from Crazy Mary Revista.
Even small sewing spaces can benefit from the extra storage an ironing center provides. In fact, it can take up less space than a full-sized ironing board, saving you space!
While we have seen a few carts with ironing boards on top for sale, they tend to be small and a bit tipsy. Plus, quilters usually prefer a straight-edged board rather than one with the standard curve.
So, for a solid, well-functioning ironing station for quilting, you’ll want to make your own (perhaps with help from someone who is good with carpentry tools!).
That way you can size it to fit your space and your pressing style.
All good DIY sewing stations have a few things in common: a storage unit of some kind for the bottom, an ironing board on top, and many have wheels.
Put on your thinking cap and decide what will work best in your space for the storage unit. An old bookshelf or dresser, a baby changing table, kitchen cabinets, and old table with new bins underneath … whatever you can find to repurpose that fits your space is a good candidate.
Thrift stores and resale shops are good places to look. IKEA tables and shelving units are often used, too.
Just make sure whatever you choose will be tall enough once completed.
For the ironing board, a piece of plywood covered with batting and a nice fabric will do. But, you’ll probably want to include a layer of Silver Ironing Board Fabric or Insul-Bright for heat proofing.
While you may be tempted to skip it, heat proofing is a good idea. That way you can use a thinner batting that won’t produce a poofy ironing board (which won’t give you flat seams when pressing).
Plus, if the board is large enough, you can also use it as a cutting table.
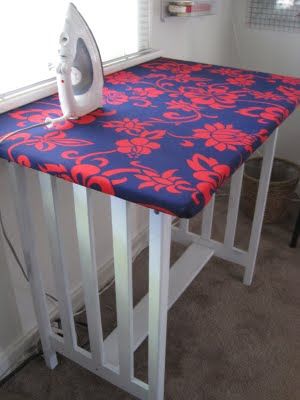
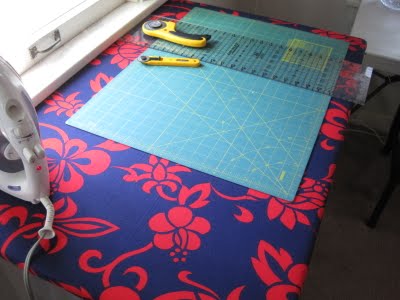
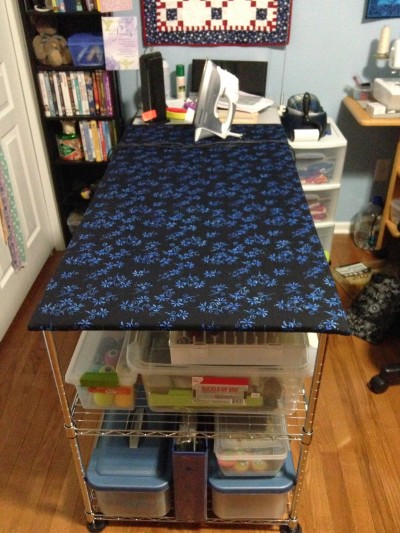
Ironing board made from a table. Tutorial from HckoryDickoryDock.
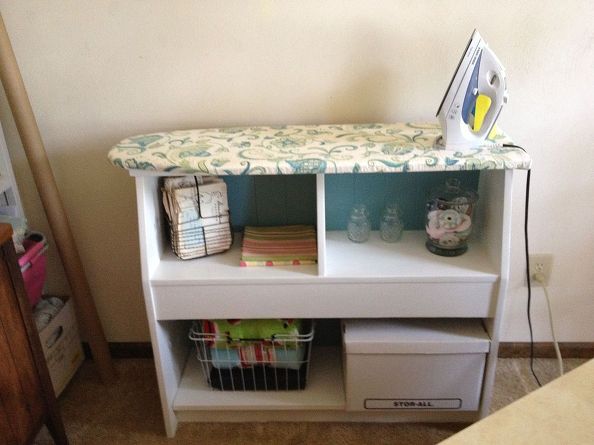
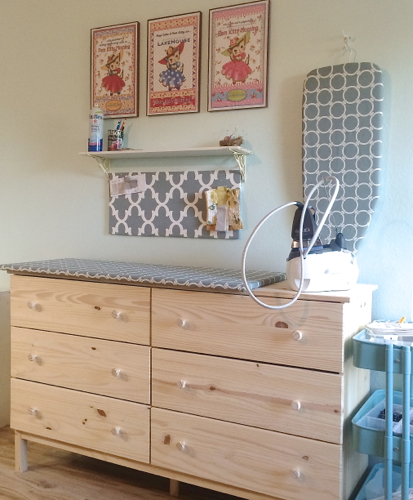 Ironing and packing station made from a dresser. Learn how at Stop Staring and Start Sewing.

From InStitchesWithBonnie.
 Made from an unused wall table. From Sew Kind of Wonderful.
Made from a twin headboard. From Hometalk.

Seen on QuiltingBoard.
Tutorial available on QuiltingWithMom.

Lori Holt’s ironing and cutting table.
Here’s how she made it, with good insights for designing your own.
A staple gun and some hand tools, and maybe some paint, are all you’ll need to construct your own ironing station from a storage unit and a sturdy board. Look at the links under the pictures above to learn how these were made. You’ll pick up some good pointers.
For insulating your ironing board:


