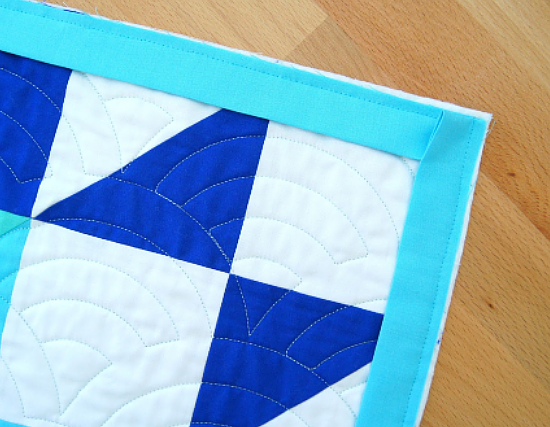
Get Crisp Binding Corners in Fewer Steps with This Hack


It’s a Game-Changer for Many Quilters!
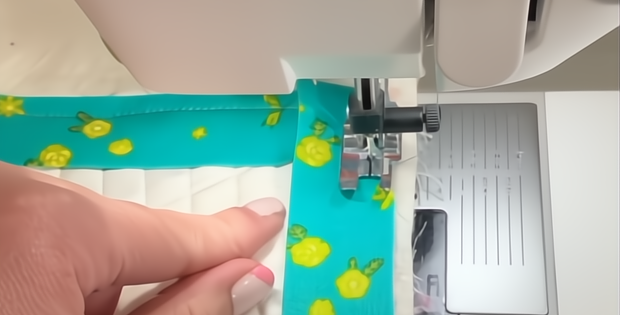
Sewing the binding onto a quilt is simple enough, but this great idea simplifies the process even more. Instead of stopping and restarting at the corners, the entire binding can be sewn down in one continuous seam.
The resulting corners are just as crisp and neat with less hassle. Once you try this hack, you may never go back.
Jemima Flendt from Tied with a Ribbon explains how binding is typically handled in the corners:
“When I first learned how to quilt – I used to sew my binding to the front of my quilt and then as I got to the corner (where I was going to mitre it) I would stop 1/4 of an inch before the end, take the quilt out of the sewing machine, make the mitre with the binding, pin it in place, then place it back in my machine to continue to sew before reaching the next corner and then repeating.”
She has since refined the method so that the binding can be sewn down in one continuous seam. The following video shows how it’s done. Written instructions are in the sidebar (notice that she has not yet trimmed the backing and batting, so the edge of the quilt looks different than what you may be used to).
A written tutorial can be found here.
Note for Non-Instagram Users: Click the link to the video. If you get an Instagram screen encouraging you to sign up, click “Open Instagram.” If the next screen shows a variety of photos, click on “Done” in the upper left corner. This should deliver you to Jemima’s tutorial.


