Simplify Paper Piecing with the No-Tear Method


No Need to Tear Out Paper When the Block is Done!
Paper piecing intimidates a lot of quilters, and is disliked by others who have had bad experiences. However, it’s a wonderful technique to have in your tool box and can become quite addictive. You probably just need the right instructions to get rolling with it.
The benefits of paper piecing make it well worth the effort to learn. Not only can you easily piece intricate blocks, it produces unparalleled accuracy. Plus, you can create small blocks and those with tiny pieces that would be hard to piece the standard way. And, there are so many wonderful block patterns available!
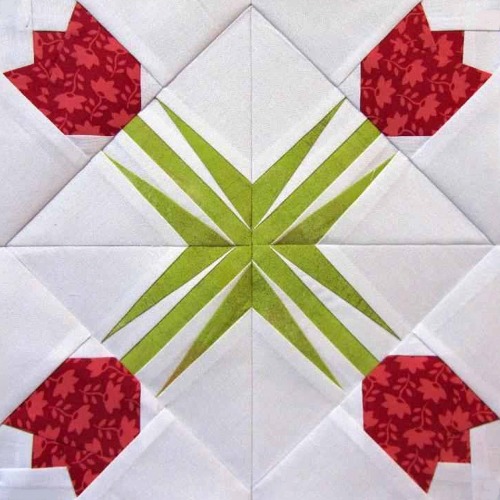
Find the pattern for the “Twinkling Tulips” block here (along with 4 other amazing blocks).
It’s definitely time to give paper piecing a try, and this method eliminates the most tedious step.
One drawback to paper piecing is having to tear out paper once the blocks are sewn. No more!
No-tear paper piecing is just as accurate and there’s no paper to tear out at the end.
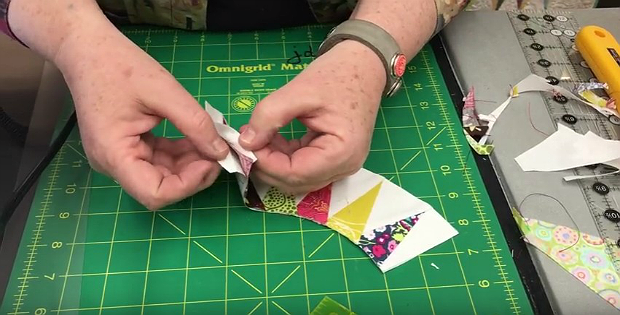
The following video Julie from The Sewing Palace shows you how it’s done. She uses C. Jenkins Freezer Paper Sheets, as they adhere better to the fabric and can be reused (if unavailable check out the options here).
You can also view the video here at YouTube.
In the next video Beverly from Quilt N Bee demonstrates her method. She uses regular freezer paper and an unthreaded machine to pierce the block layout on several sheets at a time.
Notice, too, how she adds a piece to the block that must go over other seams. Watch how she trims, and the seam allowances she leaves behind.
You can also view the video here at YouTube.
The free pattern for the quilt she’s working on can be found here.
If you prefer written instructions, Rachel at Wooden Spoon Quilts has written an excellent tutorial. Note how she cuts the fabric pieces first for easier placement and sure coverage of the area they’re meant for. This also saves on wasted fabric.
Rachel’s tutorial is great for those just starting out with paper piecing. It will save you a lot of trial and error and help you learn the method quickly. Once you learn the process you can “wing it”, like in the videos above, and work with fabric that hasn’t first been cut into shapes.


